How To Build a “Living Fence”
FarmLife offers step-by-step instructions on using hedges to create a barrier that’s “bull strong and hog tight.” For our ancestors, it wasn’t uncommon to use materials found on their land to fence in their livestock. Some made their own fences...
How To Build a “Living Fence”
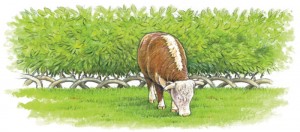
FarmLife offers step-by-step instructions on using hedges to create a barrier that’s “bull strong and hog tight.” For our ancestors, it wasn’t uncommon to use materials found on their land to fence in their livestock. Some made their own fences...FarmLife offers step-by-step instructions on using hedges to create a barrier that’s “bull strong and hog tight.”
For our ancestors, it wasn’t uncommon to use materials found on their land to fence in their livestock. Some made their own fences from Mother Nature’s bounty, while others grew them in the form of hedgerows. The latter method may have taken longer, but since most folks tended to settle their homesteads early in life with the notion of staying there for the rest of their days, such a living fence made sense.
Such a fence is, however, just as viable an option today and FarmLife offers season-by-season tips on how to do so. What follows are the basics steps of growing and creating such a fence. For the full article, visit www.myfarmlife.com/farmstead/bull-strong-hog-tight/.
• Establishing an animal-tight hedge will take a few years and you’ll need to devise a plan to keep your grazing animals away from it until it becomes well established.
• In the fall, lay out your hedge and mow down the grass where it will be planted. Turn a furrow or otherwise till the area; the turned soil will mellow over the winter. If weeds or grass begin to sprout, turn down with a disc, tiller or hoe.
• When choosing the main structural wood for your hedge, consider easy-suckering hardwood trees like Osage orange, black locust, holly, honey locust, elm or oak. Typically, plants native to your area work best.
• Similar results can be achieved when planting seed or transplanting seedlings. You’ll need enough of either, though, to plant every 12 to 18 inches in your furrows.
• Plant the seeds or seedlings at about the time you would normally plant corn in your area.
• As your hedge seedlings germinate, thin and/or redistribute to accomplish the ideal spacing.
• To plash the seedlings the following fall, carefully lay them over at about 2/3 of the way up from the base to the tip. Then secure them to the ground by covering the tip with soil. If simply burying them doesn’t hold the plant tips down, you may need to use anchor pins.
• The following spring, the now-horizontal seedlings will send up shoots vertically along the trunk. In the fall, bend these shoots horizontally and weave them together so you get a woven barrier that’s about 24 inches off the ground.
• In the third spring, these stems will begin growing into one another. By the third fall, new shoots will have also grown vertically. If you wish, weave this growth together or simply prune the hedge to its final height.
• In subsequent summers, prune the growing green shoots several times. This will stimulate the lower buds to produce more lateral branches, which will make the hedge even less permeable.
In the end, you’ll have established a lovely hedge that will harbor all manner of songbird nests and one that will contain all but the most determined livestock.
For the full article, visit www.myfarmlife.com/farmstead/bull-strong-hog-tight/.
Do you have a living fence or another made with traditional materials such as stone or wood harvested off your land? Send us a picture and we’ll share it with other readers.


